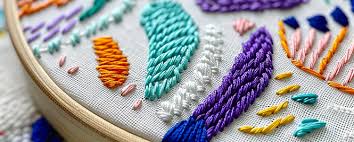
Beginner’s Guide to Embroidery Patterns
Embroidery is a delightful craft that has been practiced for centuries. It allows individuals to express their creativity through the intricate art of stitching. For beginners, understanding the various embroidery patterns can seem daunting, but it’s an essential step in mastering this beautiful art form. This guide will introduce you to embroidery patterns, techniques, and tips to help you get started on your embroidery journey. Beginner’s Guide to Embroidery Patterns
1. What Are Embroidery Patterns?
Understanding Embroidery Patterns
Embroidery patterns are designs used as a guide for stitching. They can range from simple shapes and motifs to complex images and scenes. Patterns can be printed on fabric or traced from a template, serving as a roadmap for your stitching. They provide structure and help create beautiful, cohesive designs.
Types of Embroidery Patterns
There are several types of embroidery patterns, including:
Line Patterns: Simple designs created with continuous lines, often used in basic stitching.
Filled Patterns: These involve filling a shape with stitches, creating solid areas of color or texture.
Motif Patterns: Small, repeating designs, like flowers or geometric shapes.
Freehand Patterns: Unique, custom designs created without a specific guide, allowing for personal expression.
2. Essential Tools for Embroidery
Embroidery Hoops
Embroidery hoops are essential for keeping your fabric taut while you stitch. They come in various sizes and materials, including plastic and wood. A properly tightened hoop prevents fabric distortion and makes stitching easier.
Needles and Threads
Choosing the right needles and threads is crucial for successful embroidery. Here are some tips:
Needles: Use embroidery needles with a larger eye to accommodate different types of threads. Common sizes range from 5 to 10, depending on the fabric.
Threads: Cotton embroidery floss is popular among beginners. It comes in various colors and can be separated into strands for different thicknesses.
Fabric Choices
When starting, choose a fabric that is easy to work with. Cotton, linen, and even canvas are excellent options. Look for a fabric with a tight weave, as it holds stitches well and provides a smooth surface for your designs.
3. Choosing Your First Embroidery Pattern
Beginner-Friendly Patterns
As a beginner, it’s essential to start with simple patterns that will build your confidence. Look for designs featuring basic shapes, like:
Simple flowers
Geometric patterns
Animals
Basic monograms
Resources for Finding Patterns
There are numerous resources available for finding beginner-friendly embroidery patterns:
Online Platforms: Websites like Pinterest, Etsy, and various embroidery blogs offer a plethora of free and paid patterns.
Books: Consider investing in beginner embroidery books that include step-by-step instructions and patterns.
Embroidery Kits: Kits often come with everything you need, including patterns, threads, and fabric, making them an excellent choice for beginners.
4. Basic Embroidery Stitches
Common Stitches for Beginners
Familiarizing yourself with basic embroidery stitches is crucial. Here are a few fundamental stitches to get you started:

Running Stitch: A simple stitch created by passing the needle in and out of the fabric. It’s often used for outlines and straight lines.
Backstitch: This stitch is ideal for outlines. You create it by stitching backward to form a continuous line.
Whip Stitch: Perfect for edging, this stitch involves looping the thread over the edge of the fabric.
Satin Stitch: This filling stitch creates a smooth surface by stitching closely together to cover an area.
Practicing Your Stitches
Before diving into a project, practice each stitch on a scrap piece of fabric. This will help you gain confidence and improve your stitching technique.
5. Transferring Patterns to Fabric
Methods for Transferring Designs
Once you’ve chosen a pattern, you’ll need to transfer it to your fabric. Here are a few common methods:
Tracing: Use a lightbox or window to trace your design onto the fabric using a fabric pencil or disappearing ink pen.
Iron-On Transfers: Some patterns come as iron-on transfers, which can be easily applied to fabric with heat.
Printable Designs: Print your pattern on transfer paper and use an iron to adhere it to your fabric.
Preparing Your Fabric
Before transferring the design, ensure your fabric is clean and ironed. This will prevent any creases from affecting your stitching and ensure a neat finish.
6. Tips for Successful Embroidery
Stay Organized
Keeping your workspace organized will help you stay focused. Store threads, needles, and tools in designated containers to prevent clutter.
Take Your Time
Embroidery is a meticulous craft, so take your time with each stitch. Rushing can lead to mistakes, which may discourage you as a beginner.
Join a Community
Connecting with other embroidery enthusiasts can provide support and inspiration. Consider joining online forums, social media groups, or local embroidery clubs to share tips and learn from others.
7. Expanding Your Skills
Advanced Patterns and Techniques
As you become more comfortable with embroidery, consider exploring more complex patterns and techniques. Some advanced stitches include:
French Knots: A decorative knot that adds texture and dimension.
Lazy Daisy: A floral stitch that creates petals by looping thread.
Chain Stitch: A decorative stitch that resembles a chain and is perfect for outlines.
Experimenting with Mixed Media
Don’t be afraid to experiment with mixed media in your embroidery projects. Combine embroidery with fabrics, beads, and other materials to create unique, textured designs.
Conclusion
Embroidery is a rewarding and creative craft that anyone can learn. By understanding the basics of embroidery patterns, essential tools, and techniques, you can embark on a fulfilling journey into the world of stitching. Start with simple patterns, practice your skills, and gradually expand your knowledge. With patience and creativity, you’ll create beautiful embroidered pieces that reflect your style and artistry. Happy stitching!
