Goldwork Embroidery Basics

Goldwork Embroidery Basics

Goldwork Embroidery Basics: A Comprehensive Guide for Beginners

Goldwork embroidery is a traditional and luxurious form of needlework that has been used for centuries to create intricate, beautiful designs. Known for its stunning use of metallic threads, goldwork embroidery can be found in everything from religious artifacts to royal garments. This technique can be daunting for beginners, but with the right knowledge of tools, materials, and techniques, anyone can learn to create stunning goldwork embroidery pieces. In this article, we’ll cover everything you need to know about goldwork embroidery basics, from essential materials to essential techniques.

What is Goldwork Embroidery?

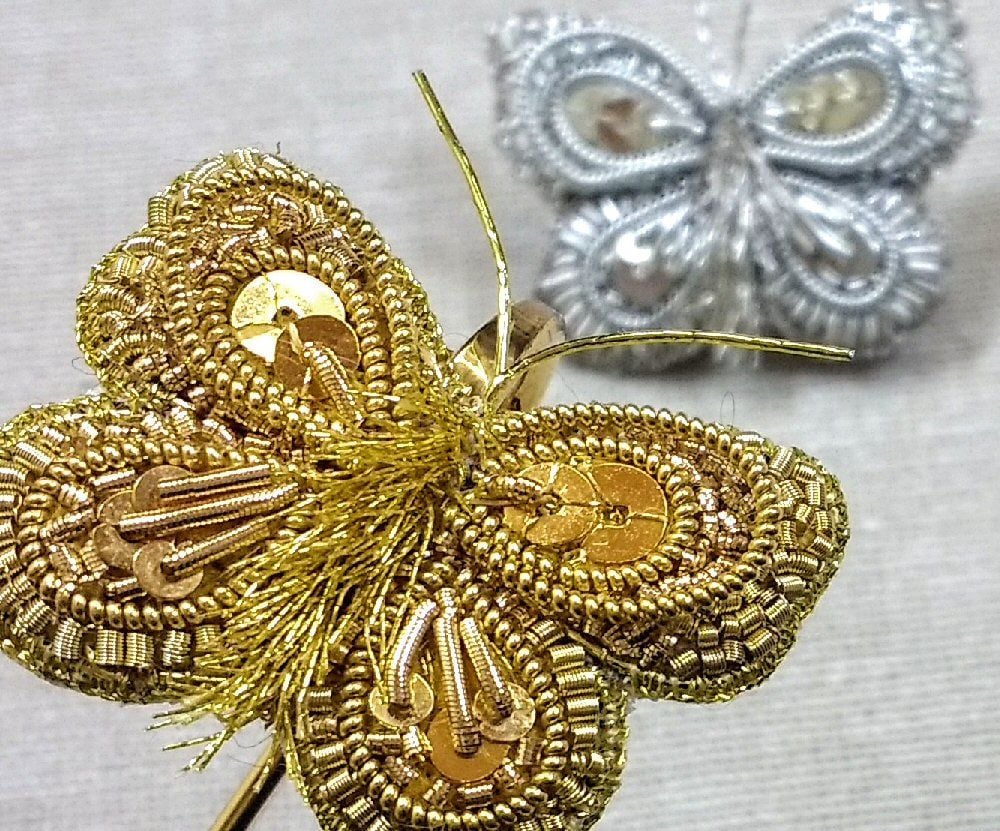
Goldwork embroidery is a style of embroidery that involves the use of metallic threads, most often gold or silver, to create intricate designs on fabric. The technique was historically used for religious vestments, royal clothing, and ceremonial garments, but today it is enjoyed as a form of art and craft. Goldwork embroidery stands out because of the way it catches and reflects light, creating a rich, elegant look.

The primary thread used in goldwork is metallic thread, which is made by wrapping a fine wire around a core thread or coating a thread with a thin layer of metal. This results in a shiny, reflective surface that mimics the appearance of gold, silver, or other precious metals.

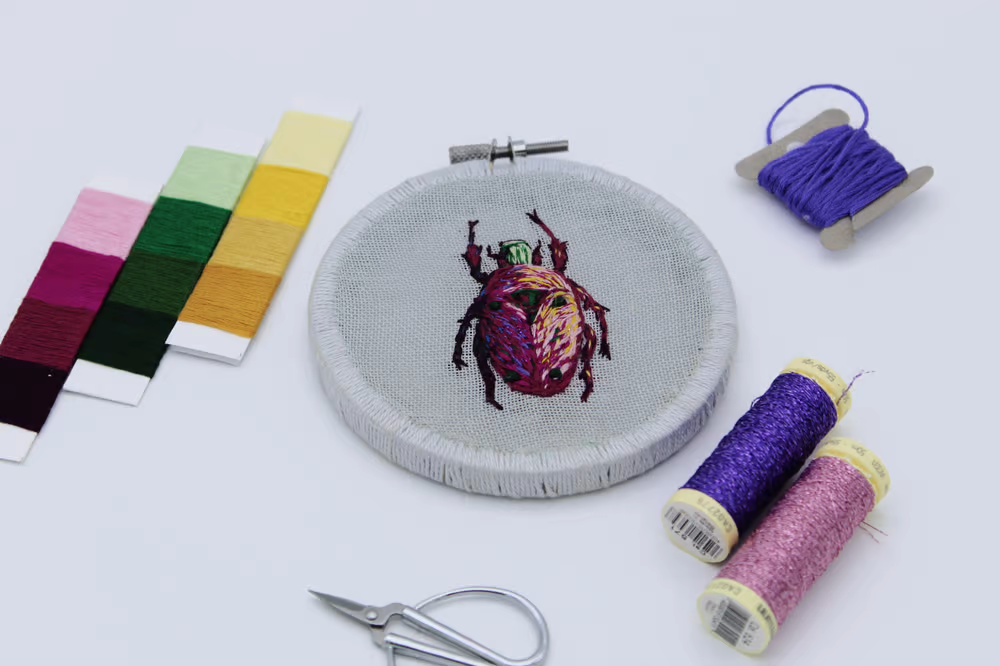
Goldwork embroidery is often combined with other techniques like silk shading, beads, and sequins to create vibrant, textured designs. It’s perfect for creating detailed, decorative embellishments, and with a bit of practice, it can be used for everything from clothing to home decor.

Essential Tools and Materials for Goldwork Embroidery

Before diving into the techniques, it’s essential to gather the right materials and tools for your goldwork embroidery projects. Using the correct materials will ensure that your stitches are precise, the metallic threads stay intact, and your finished piece looks as polished as possible. Here’s what you’ll need:

1. Fabric

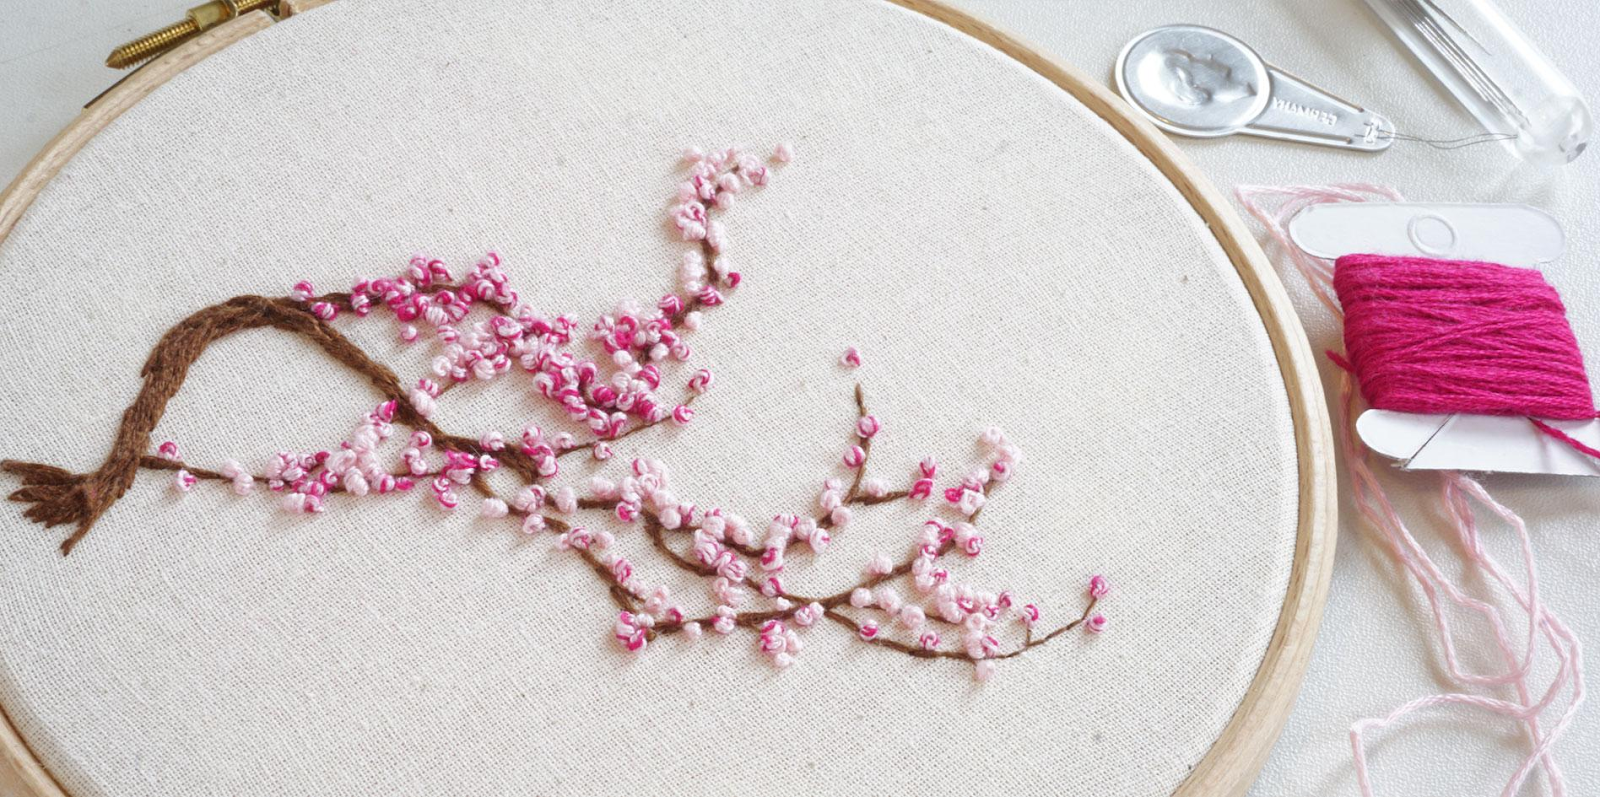
Choosing the right fabric is critical for any type of embroidery, but especially for goldwork, as the fabric needs to support the weight and tension of metallic threads. Popular fabric choices for goldwork embroidery include cotton, linen, and silk. These fabrics provide a sturdy surface that can handle the tension created by the heavier metallic threads without puckering or distorting the fabric.

For beginners, cotton or linen is often recommended, as they’re easier to work with and more affordable than silk. The fabric should be tightly woven to ensure that the stitches stay securely in place.

Goldwork Embroidery Basics

2. Metallic Threads

The core of any goldwork piece is the metallic thread. These threads come in a variety of forms, including passing thread, couching thread, and thread with a metal core. Passing thread is often the primary thread used for goldwork because it’s relatively thick and flexible, perfect for creating bold designs. Couching thread is used to hold the passing thread in place, while metallic threads can also be used for finer detailing.

You can find metallic threads in a variety of colors and textures, but gold, silver, and copper are the most commonly used. It’s also worth noting that metallic threads can be more delicate than regular embroidery floss, so handling them carefully is crucial.

3. Needles

Goldwork requires specialized needles designed to accommodate thick metallic threads. The most commonly used needles for goldwork are crewel needles, which have a larger eye to accommodate the metallic threads. They are also tapered to a fine point, allowing for easy insertion into the fabric without causing damage to the thread or fabric.

If you’re using passing thread, you may also need blunt-end needles to prevent damaging the delicate threads.

4. Embroidery Hoop or Frame

While it’s possible to do goldwork embroidery without a hoop, using an embroidery hoop or frame is highly recommended. A hoop helps to keep your fabric taut, ensuring that the stitches are evenly placed and preventing any distortion in the design. It’s especially useful when working with metallic threads, as it ensures you have enough tension to prevent thread tangling.

5. Scissors

Since metallic threads can be delicate, it’s important to use a pair of sharp, small embroidery scissors to cut your threads. A clean, precise cut will prevent fraying and help maintain the overall quality of your goldwork piece.

6. Beeswax or Thread Conditioner

Because metallic threads can be prone to tangling, it’s often helpful to run the threads through a bit of beeswax or a thread conditioner before stitching. This adds a bit of lubrication to the thread, making it easier to work with and helping prevent fraying.

Goldwork Embroidery Techniques You Need to Know

Goldwork embroidery involves several techniques that work together to create intricate, textured designs. Below are some of the most commonly used techniques in goldwork:

1. Couching

Couching is one of the most fundamental techniques in goldwork embroidery. It involves laying a thread (often a metallic thread like passing thread) onto the fabric and securing it in place with another thread (called the couching thread). The couching thread is stitched down over the metallic thread in small, evenly spaced stitches. This creates the appearance of a smooth metallic line without the need to stitch through the delicate metallic thread.

Couching can be used to outline shapes or create textured patterns in goldwork embroidery. The placement of the couching stitches can significantly affect the final appearance, so experimentation is key to achieving the desired look.

2. Padding

Padding is used to add dimension to a design, giving it a raised or sculptural effect. Padding involves stitching layers of thread (usually wool or a thicker type of cotton) to build up areas of the design, creating a raised surface on which the metallic thread is applied. Padding is often used in combination with couching to add extra depth and texture to designs.

When padding, make sure the layers are smooth and even, as this will ensure that the final goldwork looks polished and uniform.

3. Using Different Types of Metallic Threads

Goldwork embroidery often uses a variety of different metallic threads, each with its own unique look and application. Below are a few types of metallic threads commonly used:

  • Passing Thread: This is the primary metallic thread used for goldwork. It’s typically a thick, flexible thread used for creating outlines and bold designs.
  • Variegated Threads: These threads have a range of colors that change gradually along the length of the thread, adding visual interest and texture to designs.
  • Gold or Silver Wire: For more advanced goldwork projects, you might use gold or silver wire. This wire can be sewn onto the fabric for a truly luxurious finish, often using a couching technique to hold it in place.

4. Shading and Blending

Shading in goldwork is often done using metallic threads in different shades to create a smooth transition between light and dark areas. This technique is often combined with silk shading or other thread types to create a more nuanced effect. By blending different types of threads, such as metallic and non-metallic threads, you can achieve a more sophisticated design.

Experiment with shading in small sections of your piece to see how the threads interact with each other. Be mindful of the direction of your stitches, as this can also affect the overall effect.

Freestyle Embroidery Essentials

Freestyle Embroidery Essentials

Freestyle Embroidery Essentials: A Guide for Creative Stitchers

Freestyle embroidery is an exciting and dynamic way to express your creativity through stitching. Unlike traditional, structured forms of embroidery, freestyle allows you to break free from rigid patterns and create spontaneous, original designs. Whether you’re a beginner or an experienced embroiderer, understanding the essentials of freestyle embroidery can help elevate your stitching skills and inspire new creative possibilities. In this guide, we’ll explore everything you need to know about freestyle embroidery, from tools and materials to techniques and design tips.

What is Freestyle Embroidery?

Freestyle embroidery is a form of hand embroidery where the artist has complete freedom to create designs without following a specific pattern or template. It is characterized by its fluid, organic nature and can include a variety of stitches, techniques, and styles. The lack of strict rules allows the artist to experiment and explore new concepts, making it an exciting and flexible art form.

While traditional embroidery often involves following a set pattern or design, freestyle embroidery embraces creativity, allowing for abstract, free-flowing, and even spontaneous designs. This method can be used to create everything from intricate floral patterns to abstract geometric shapes, and the possibilities are endless.

Essential Tools and Materials for Freestyle Embroidery

Before you start your freestyle embroidery project, it’s important to gather the right tools and materials. Having the proper supplies will make your stitching experience more enjoyable and ensure that your designs turn out beautifully. Here are the essential tools and materials you’ll need:

1. Fabric

Choosing the right fabric is crucial for your freestyle embroidery projects. Most embroiderers opt for cotton, linen, or canvas because these fabrics are easy to work with and have a smooth texture that allows for precise stitching. However, you can also experiment with denim, felt, or even silk for more unique and creative designs.

It’s important to consider the weight and texture of your fabric when choosing it for freestyle embroidery. For beginners, starting with a medium-weight fabric, like cotton, is a good idea. If you’re more experienced, you might enjoy working with fabrics like velvet or even upcycled materials.

Freestyle Embroidery Essentials

2. Threads

The type of thread you use will significantly impact the texture and overall look of your freestyle embroidery. Cotton floss is a popular choice for most embroiderers due to its versatility, but you can also use other threads, such as silk, wool, or metallic threads, to add texture and dimension to your designs.

Variegated threads, which change colors as you stitch, are also commonly used in freestyle embroidery to create more dynamic effects. Don’t be afraid to experiment with different types of threads to see how they affect the overall look of your work.

3. Needles

Embroidery needles come in various sizes and types, depending on the thread and fabric you’re using. Crewel needles are commonly used in freestyle embroidery as they have a slightly larger eye to accommodate thicker threads, but you may also need smaller needles for finer threads or delicate fabrics. Tapestry needles, which have a blunt tip, can also be useful for certain types of stitches.

4. Embroidery Hoop

Although you can work without a hoop, using one can help keep your fabric taut, ensuring that your stitches are even and clean. A hoop also prevents fabric puckering, which is especially helpful when working on larger or more complex designs.

Embroidery hoops come in various sizes, so choose one that suits your project. For larger designs, you might want a larger hoop, while smaller projects can be done with a smaller hoop. Hoopless embroidery is another technique you can explore once you’re comfortable with freestyle stitching, allowing your fabric to remain loose and more fluid.

5. Scissors

Sharp embroidery scissors are essential for cutting threads with precision. Make sure to use a pair of small, pointed scissors for clean cuts, particularly when trimming away any excess thread after stitching.

6. Fabric Markers

Fabric markers or pencil chalk can be useful for marking out any design elements on your fabric before you begin stitching. While freestyle embroidery is often spontaneous, it can help to have some initial guidance, especially if you’re working on larger designs.

Freestyle Embroidery Stitches You Should Know

One of the most exciting aspects of freestyle embroidery is the wide variety of stitches you can use. These stitches can be combined in countless ways to create textured, detailed, and visually interesting designs. Here are some essential freestyle embroidery stitches:

1. Running Stitch

The running stitch is one of the simplest and most versatile stitches, making it a great starting point for freestyle embroidery. It’s perfect for outlining shapes, creating linear designs, or adding texture to your work. To create a running stitch, simply pass the needle in and out of the fabric in a series of even stitches.

2. Backstitch

The backstitch is another common embroidery stitch, ideal for outlining shapes or creating continuous lines. Unlike the running stitch, the backstitch is done by inserting the needle backward over the previous stitch, creating a solid, continuous line. It’s a great choice for bold, defined lines in your freestyle design.

3. French Knot

The French knot is a decorative stitch that creates a small, raised knot on the surface of the fabric. This stitch is often used to add texture and dimension to designs, such as creating flower centers or adding detail to patterns.

4. Satin Stitch

The satin stitch is a solid, filled stitch used to cover larger areas with thread. This stitch is great for adding bold, smooth shapes to your freestyle designs and can be used to fill in letters, flowers, or any other solid shapes.

5. Chain Stitch

The chain stitch creates a series of interconnected loops, making it an excellent choice for decorative borders, curved lines, or textured patterns. It’s often used in freestyle embroidery to create a flowing, continuous design.

6. Lazy Daisy Stitch

The lazy daisy stitch is often used for creating simple flowers. It involves stitching small petals in a looped manner, giving your design a soft, delicate look. This stitch is great for freestyle florals and adding fluid, organic shapes to your embroidery projects.

7. Stem Stitch

The stem stitch is used to create smooth, curved lines, often resembling the shape of a stem or vine. It’s perfect for drawing out intricate designs, and when used in freestyle embroidery, it gives a more textured, dimensional effect compared to simple backstitch.

Tips for Mastering Freestyle Embroidery

Freestyle embroidery offers endless creative possibilities, but it can be intimidating for beginners. Here are some tips to help you master the art of freestyle embroidery:

1. Start Simple

If you’re new to freestyle embroidery, start with simple shapes and designs. Practice using basic stitches like running stitch and backstitch before moving on to more complex techniques. Once you feel comfortable, try incorporating multiple stitches and creating more intricate patterns.

2. Experiment with Colors

Freestyle embroidery allows you to experiment with color in exciting ways. Don’t be afraid to use bright, contrasting colors or even try out gradient effects using variegated threads. The freedom to experiment with colors is one of the joys of freestyle embroidery, so embrace the opportunity to add personality and flair to your designs.

3. Combine Stitches for Texture

One of the most appealing aspects of freestyle embroidery is the ability to mix and match different stitches to create texture. For example, you can combine satin stitches with French knots to add dimension to your flowers, or layer backstitch with chain stitch for a more dynamic effect.

4. Keep It Loose and Organic

While it’s tempting to aim for perfect, symmetrical stitches, freestyle embroidery thrives on an organic, free-flowing approach. Don’t worry about making every stitch uniform or precise. The beauty of freestyle embroidery lies in its relaxed, imperfect nature.

5. Let Your Imagination Guide You

Freestyle embroidery is all about self-expression. Let your imagination run wild and experiment with different techniques and designs. You can draw inspiration from nature, abstract art, or even everyday objects—there’s no limit to what you can create!

Conclusion

Freestyle embroidery offers endless opportunities for creativity and personal expression. Whether you’re embellishing clothing, decorating your home, or creating unique pieces of art, freestyle embroidery allows you to explore new techniques and bring your designs to life in a way that feels truly original. By understanding the essential tools, materials, and stitches, and with plenty of practice, you’ll be well on your way to mastering this dynamic and versatile craft. So grab your needle and thread and let your creativity flow!

Modern Embroidery Methods

Modern Embroidery Methods

Modern Embroidery Methods: A Creative Journey into Contemporary Stitching

Embroidery, a centuries-old craft, has evolved over the years into a vibrant and creative art form. Modern embroidery methods blend traditional techniques with new approaches, materials, and ideas, allowing for endless possibilities. Whether you’re new to embroidery or an experienced crafter, exploring modern techniques can help elevate your projects and add a contemporary flair. In this article, we’ll dive into the most popular modern embroidery methods, providing tips and inspiration to bring your designs to life.

What is Modern Embroidery?

Modern embroidery refers to the contemporary approaches and techniques used in stitching, incorporating elements from traditional embroidery while embracing new materials, styles, and artistic expression. It includes everything from minimalist designs to bold, abstract patterns, as well as the use of mixed media, such as fabric painting, beading, and embellishments.

While traditional embroidery was often used for household items and garments, modern embroidery often serves as a form of self-expression, personal art, and fashion. Today, embroidery is found on everything from fashion accessories and home décor to unique wall art and mixed media pieces.

Key Tools and Materials for Modern Embroidery

Before diving into modern embroidery methods, it’s important to have the right tools and materials. These are some of the essential items you’ll need to get started:

1. Fabric

In modern embroidery, you have more fabric options than ever before. Linen, cotton, and canvas remain popular choices, but now you can also explore alternatives like denim, velvet, and even upcycled materials like old t-shirts or sweaters. The type of fabric you choose will depend on the style of your design, the thread you’re using, and the texture you want to achieve.

2. Embroidery Threads

Modern embroidery methods allow for a wide range of thread options. The classic cotton floss remains a staple, but other thread materials such as silk, wool, metallic threads, and variegated threads have become increasingly popular. Each type of thread offers unique textures and finishes, allowing for different effects in your designs.

Modern Embroidery Methods

3. Needles

Embroidery needles come in different sizes, and modern needle choices range from traditional crewel needles to specialized beading needles. For most modern embroidery methods, a size 24 or 26 needle will work well for the typical floss, while smaller needles may be required for more delicate threads.

4. Embroidery Hoop or Frame

An embroidery hoop or frame is still an essential tool, especially for beginners. It holds your fabric taut while you stitch, preventing puckering and allowing you to create even stitches. Some modern embroiderers prefer using hoopless embroidery where the fabric is stretched over a frame or placed on a flat surface.

5. Scissors and Other Tools

Sharp embroidery scissors are important for cutting threads neatly and precisely. You might also want to consider tools like fabric markers for tracing your designs and beading needles for adding embellishments like beads, sequins, or metallic threads to your pieces.

Popular Modern Embroidery Methods

Modern embroidery methods offer a broad range of techniques that allow artists to combine traditional stitches with innovative ideas. Here are some of the most popular techniques used in modern embroidery today:

1. Freehand or Improvisational Embroidery

Freehand embroidery is all about breaking away from patterns and rules. This modern approach allows you to stitch designs that are spontaneous and original. Often, this method involves using basic stitches like the running stitch or backstitch in combination with more creative, unpredictable motions. Freehand embroidery allows for artistic expression, where you can create abstract art, geometric shapes, and organic designs with little planning.

Freehand stitching works great on a variety of projects, from apparel and accessories to wall art and home décor. It’s a wonderful method for those who enjoy working intuitively and experimenting with new ideas.

2. 3D Embroidery

One of the most exciting developments in modern embroidery is the creation of 3D designs. Raised or dimensional embroidery is achieved by adding extra texture and height to your designs. This can be done by using techniques like bullion knots, padded stitches, and French knots to create designs that “pop” off the fabric.

3D embroidery is often used to create lifelike flowers, animals, and geometric patterns. The technique is perfect for adding depth to your designs and can be used in fashion, home décor, and artistic pieces. If you’re looking to create pieces that have a tactile, eye-catching quality, this modern method is perfect for you.

3. Mixed Media Embroidery

Mixed media embroidery is a contemporary approach where embroidery is combined with other forms of art, such as fabric painting, drawing, or printing. This technique opens up endless creative possibilities, blending different textures, colors, and techniques into a single piece.

For example, you might add painted backgrounds or drawn elements to your embroidered design, or integrate beading and sequins to create intricate, sparkling patterns. Mixed media embroidery can be used for everything from fashion design to home décor, allowing you to experiment and push the boundaries of traditional stitching.

4. Embroidery with Beads and Sequins

Adding beads, sequins, and rhinestones to embroidery has become a popular trend in modern embroidery. This technique involves attaching small embellishments to your design to create sparkle, texture, and shine. Bead embroidery is often done by stitching beads directly onto the fabric or using a beading needle to thread them into your design.

This method can be incorporated into a wide range of embroidery projects, including accessories, clothing, and artwork. The addition of beads and sequins can elevate your design and give it a luxurious, high-fashion feel. Many modern embroidery artists use these embellishments to create intricate, detailed patterns that are full of texture.

5. Contemporary Cross-Stitch

Cross-stitch has long been a favorite of crafters, but in recent years, it’s undergone a modern transformation. Contemporary cross-stitch designs now feature quirky phrases, minimalist patterns, and abstract designs that depart from traditional motifs. Artists have incorporated bold, modern typography, geometric shapes, and stylized designs to give cross-stitch a contemporary edge.

While traditional cross-stitch uses Aida fabric, modern artists often experiment with alternative fabrics like linen, cotton, or even denim, offering a fresh take on this classic technique.

6. Thread Painting

Thread painting is a method used to create realistic, detailed images by using a series of long and short stitches that mimic the texture and shading of a painted image. Modern thread painting takes the traditional technique of needlepainting and adds a more contemporary twist by using different thread materials, such as silk threads or metallics, for greater depth and contrast.

This technique is perfect for creating lifelike portraits, flowers, and animals. Modern thread painting allows embroidery artists to create works of art that look like intricate paintings, but with the added texture and dimension that only embroidery can offer.

Exploring Surface Embroidery

Exploring Surface Embroidery

A Beginner’s Guide to Cross-Stitch: Everything You Need to Know

Cross-stitching is one of the oldest and most popular forms of embroidery, offering a simple yet creative way to embellish fabric with colorful designs. If you’re new to this craft, you may be wondering where to begin. This beginner’s guide to cross-stitch will walk you through the basics, including essential supplies, how to start your first project, and tips to make your stitching process enjoyable. With a little practice, you’ll be creating beautiful designs in no time!

What is Cross-Stitch?

Cross-stitch is a form of counted-thread embroidery, where X-shaped stitches are made on fabric to form a pattern or design. The key feature of cross-stitch is that it is done using evenly spaced threads or holes, making it an accessible and relatively easy embroidery technique to learn. It’s perfect for beginners due to its straightforward approach and the ability to work with simple, clear patterns.

The beauty of cross-stitch lies in its versatility. While the basic stitch is simple, it can be used to create incredibly intricate and detailed designs. From simple motifs like flowers and animals to complex landscape scenes, cross-stitching can be adapted to virtually any type of design.

Essential Supplies for Cross-Stitch

Before you can start cross-stitching, you need to gather a few basic supplies. Here’s a list of the essentials:

1. Fabric

The most common fabric for cross-stitching is Aida cloth, which is specially designed with a grid of even squares, making it easier to count your stitches. Aida comes in various counts (the number of threads per inch), with 14-count being a popular choice for beginners. You can also use linen or evenweave fabric, though these are more advanced options and require more experience.

2. Thread

Cross-stitch thread is typically made of floss – a six-strand cotton thread that can be separated into fewer strands depending on the thickness desired. DMC is one of the most popular brands of floss, offering a wide range of colors. Beginners usually start with two strands of floss for each stitch.

Exploring Surface Embroidery

3. Needle

A cross-stitch needle has a blunt tip to easily pass through the fabric without damaging it. The size of the needle you use depends on the fabric count. For 14-count Aida, a size 24 needle is often recommended, but for higher-count fabrics, a smaller needle may be necessary.

4. Hoop or Frame

While not strictly necessary, a hoop or frame can make stitching easier by holding the fabric taut. This helps to prevent wrinkles and allows you to focus on your stitches. Embroidery hoops come in various sizes, so choose one that fits the area of your design.

5. Scissors

A pair of small, sharp scissors is essential for cutting threads neatly. A good pair will also help you trim fabric when you’re finished with your project.

How to Start Cross-Stitching: Step-by-Step Guide

Starting your first cross-stitch project is an exciting journey, and with a little patience, you’ll be able to create stunning designs. Follow these steps to get started:

1. Choose Your First Pattern

For your first project, select a simple pattern with clear instructions. Many beginners start with smaller designs like flowers, animals, or simple geometric shapes. You can find free patterns online, or you may choose to purchase a kit that includes everything you need.

When choosing a pattern, look for one that specifies the fabric count (such as 14-count Aida) and lists the required floss colors. This will help you avoid confusion and ensure that you have the right supplies.

2. Prepare Your Fabric

Cut your fabric to a size that is slightly larger than your pattern, allowing extra space for framing or finishing. Mark the center of your fabric to ensure that your design will be centered correctly. You can do this by folding the fabric in half both horizontally and vertically and marking the creases lightly with a fabric marker or pencil.

3. Thread Your Needle

Cut a piece of floss about 18 inches long. Separate the floss strands according to your pattern’s instructions—usually two strands for beginner projects. Thread your needle, tying a small knot at the end to prevent the thread from slipping through the fabric.

4. Start Stitching

Begin stitching from the center of your pattern. Cross-stitch is done by making two diagonal stitches that form an “X.” The key is to keep your stitches uniform and count the fabric threads carefully. Follow the color chart of your pattern and work in rows or blocks of color for efficiency.

The basic steps for creating a cross-stitch are as follows:

  1. Insert the needle from the back of the fabric to the front at one corner of the “X” shape.
  2. Move diagonally across the square and insert the needle back down at the opposite corner to create the first half of the stitch.
  3. Go back to the original corner and complete the second half of the “X” by moving the needle diagonally in the opposite direction.

5. Continue Stitching Row by Row

Once you’ve completed your first stitches, continue stitching row by row, following the pattern. Use the parking technique (storing unused floss out of the way) or carry your floss across the back to avoid unnecessary knots.

6. Finish and Trim Your Project

Once you’ve completed your design, carefully trim the fabric around your stitching, leaving a small margin of about 1–2 inches. You can now frame your cross-stitch piece or use it to create home décor, greeting cards, or other crafts.

Common Cross-Stitch Tips for Beginners

Here are a few helpful tips to make your cross-stitching experience smoother and more enjoyable:

1. Keep Your Stitches Even

Maintaining even stitch size is key to achieving a polished look in your cross-stitch project. Try to keep your tension consistent, not too tight or too loose, to avoid uneven stitches.

2. Count Carefully

One of the most important skills in cross-stitch is counting the fabric threads accurately. Double-check your counts before stitching to avoid mistakes that can be difficult to correct later.

3. Don’t Overload Your Needle

If you are working with a large design, it’s tempting to load up your needle with several stitches at once. However, it’s best to work with shorter thread lengths to prevent tangling and fraying.

4. Use a Thread Conditioner

If you’re working with particularly slippery floss, you may want to use a thread conditioner to make stitching easier and to help the floss glide smoothly through the fabric. This can help reduce tangling and increase the lifespan of your thread.

Advanced Cross-Stitch Techniques to Explore

Once you’ve mastered the basics, you can explore more advanced techniques to expand your cross-stitch skills:

1. Half-Stitches and Quarter Stitches

By working half or quarter stitches, you can create more intricate patterns or finer details. These smaller stitches help fill in gaps and create smoother lines.

2. Specialty Stitches

Some patterns may call for specialty stitches such as French knots, lazy daisy, or backstitch. These techniques can add texture and dimension to your designs.

3. Beads and Embellishments

To make your cross-stitch project even more unique, you can add beads or other embellishments for a bit of sparkle and texture. Beads are often used in patterns for flowers, animals, or other decorative designs.

Conclusion

Cross-stitching is a fun and rewarding craft that anyone can learn, no matter their experience level. By following this beginner’s guide and gathering the right supplies, you’ll be able to start your first project with confidence. Remember, cross-stitching takes practice, so don’t be discouraged by early mistakes. With time, you’ll be creating beautiful, detailed pieces to enjoy and share.

So grab your fabric, floss, and needle, and start stitching today!

A Beginner’s Guide to Cross-Stitch

A Beginner's Guide to Cross-Stitch

A Beginner’s Guide to Cross-Stitch: Everything You Need to Know

Cross-stitching is one of the oldest and most popular forms of embroidery, offering a simple yet creative way to embellish fabric with colorful designs. If you’re new to this craft, you may be wondering where to begin. This beginner’s guide to cross-stitch will walk you through the basics, including essential supplies, how to start your first project, and tips to make your stitching process enjoyable. With a little practice, you’ll be creating beautiful designs in no time!

What is Cross-Stitch?

Cross-stitch is a form of counted-thread embroidery, where X-shaped stitches are made on fabric to form a pattern or design. The key feature of cross-stitch is that it is done using evenly spaced threads or holes, making it an accessible and relatively easy embroidery technique to learn. It’s perfect for beginners due to its straightforward approach and the ability to work with simple, clear patterns.

The beauty of cross-stitch lies in its versatility. While the basic stitch is simple, it can be used to create incredibly intricate and detailed designs. From simple motifs like flowers and animals to complex landscape scenes, cross-stitching can be adapted to virtually any type of design.

Essential Supplies for Cross-Stitch

Before you can start cross-stitching, you need to gather a few basic supplies. Here’s a list of the essentials:

1. Fabric

The most common fabric for cross-stitching is Aida cloth, which is specially designed with a grid of even squares, making it easier to count your stitches. Aida comes in various counts (the number of threads per inch), with 14-count being a popular choice for beginners. You can also use linen or evenweave fabric, though these are more advanced options and require more experience.

2. Thread

Cross-stitch thread is typically made of floss – a six-strand cotton thread that can be separated into fewer strands depending on the thickness desired. DMC is one of the most popular brands of floss, offering a wide range of colors. Beginners usually start with two strands of floss for each stitch.

3. Needle

A cross-stitch needle has a blunt tip to easily pass through the fabric without damaging it. The size of the needle you use depends on the fabric count. For 14-count Aida, a size 24 needle is often recommended, but for higher-count fabrics, a smaller needle may be necessary.

4. Hoop or Frame

While not strictly necessary, a hoop or frame can make stitching easier by holding the fabric taut. This helps to prevent wrinkles and allows you to focus on your stitches. Embroidery hoops come in various sizes, so choose one that fits the area of your design.

5. Scissors

A pair of small, sharp scissors is essential for cutting threads neatly. A good pair will also help you trim fabric when you’re finished with your project.

How to Start Cross-Stitching: Step-by-Step Guide

Starting your first cross-stitch project is an exciting journey, and with a little patience, you’ll be able to create stunning designs. Follow these steps to get started:

A Beginner's Guide to Cross-Stitch
A Beginner’s Guide to Cross-Stitch

1. Choose Your First Pattern

For your first project, select a simple pattern with clear instructions. Many beginners start with smaller designs like flowers, animals, or simple geometric shapes. You can find free patterns online, or you may choose to purchase a kit that includes everything you need.

When choosing a pattern, look for one that specifies the fabric count (such as 14-count Aida) and lists the required floss colors. This will help you avoid confusion and ensure that you have the right supplies.

2. Prepare Your Fabric

Cut your fabric to a size that is slightly larger than your pattern, allowing extra space for framing or finishing. Mark the center of your fabric to ensure that your design will be centered correctly. You can do this by folding the fabric in half both horizontally and vertically and marking the creases lightly with a fabric marker or pencil.

3. Thread Your Needle

Cut a piece of floss about 18 inches long. Separate the floss strands according to your pattern’s instructions—usually two strands for beginner projects. Thread your needle, tying a small knot at the end to prevent the thread from slipping through the fabric.

4. Start Stitching

Begin stitching from the center of your pattern. Cross-stitch is done by making two diagonal stitches that form an “X.” The key is to keep your stitches uniform and count the fabric threads carefully. Follow the color chart of your pattern and work in rows or blocks of color for efficiency.

The basic steps for creating a cross-stitch are as follows:

  1. Insert the needle from the back of the fabric to the front at one corner of the “X” shape.
  2. Move diagonally across the square and insert the needle back down at the opposite corner to create the first half of the stitch.
  3. Go back to the original corner and complete the second half of the “X” by moving the needle diagonally in the opposite direction.

5. Continue Stitching Row by Row

Once you’ve completed your first stitches, continue stitching row by row, following the pattern. Use the parking technique (storing unused floss out of the way) or carry your floss across the back to avoid unnecessary knots.

6. Finish and Trim Your Project

Once you’ve completed your design, carefully trim the fabric around your stitching, leaving a small margin of about 1–2 inches. You can now frame your cross-stitch piece or use it to create home décor, greeting cards, or other crafts.

Common Cross-Stitch Tips for Beginners

Here are a few helpful tips to make your cross-stitching experience smoother and more enjoyable:

1. Keep Your Stitches Even

Maintaining even stitch size is key to achieving a polished look in your cross-stitch project. Try to keep your tension consistent, not too tight or too loose, to avoid uneven stitches.

2. Count Carefully

One of the most important skills in cross-stitch is counting the fabric threads accurately. Double-check your counts before stitching to avoid mistakes that can be difficult to correct later.

3. Don’t Overload Your Needle

If you are working with a large design, it’s tempting to load up your needle with several stitches at once. However, it’s best to work with shorter thread lengths to prevent tangling and fraying.

4. Use a Thread Conditioner

If you’re working with particularly slippery floss, you may want to use a thread conditioner to make stitching easier and to help the floss glide smoothly through the fabric. This can help reduce tangling and increase the lifespan of your thread.

Advanced Cross-Stitch Techniques to Explore

Once you’ve mastered the basics, you can explore more advanced techniques to expand your cross-stitch skills:

1. Half-Stitches and Quarter Stitches

By working half or quarter stitches, you can create more intricate patterns or finer details. These smaller stitches help fill in gaps and create smoother lines.

2. Specialty Stitches

Some patterns may call for specialty stitches such as French knots, lazy daisy, or backstitch. These techniques can add texture and dimension to your designs.

3. Beads and Embellishments

To make your cross-stitch project even more unique, you can add beads or other embellishments for a bit of sparkle and texture. Beads are often used in patterns for flowers, animals, or other decorative designs.

Conclusion

Cross-stitching is a fun and rewarding craft that anyone can learn, no matter their experience level. By following this beginner’s guide and gathering the right supplies, you’ll be able to start your first project with confidence. Remember, cross-stitching takes practice, so don’t be discouraged by early mistakes. With time, you’ll be creating beautiful, detailed pieces to enjoy and share.

So grab your fabric, floss, and needle, and start stitching today!

Mastering Hand Embroidery Techniques

Mastering Hand Embroidery Techniques

Mastering Hand Embroidery Techniques: A Comprehensive Guide

Hand embroidery is a beautiful and timeless art form that has been practiced for centuries. Whether you’re a beginner or an experienced stitcher, mastering hand embroidery techniques can elevate your projects and provide endless creative possibilities. This guide will explore the fundamental techniques, offer tips for perfecting your stitches, and inspire you to explore the world of hand embroidery.

What is Hand Embroidery?

Hand embroidery is a technique of decorating fabric or other materials using a needle and thread. It involves creating patterns or designs by stitching various types of threads onto fabric, often incorporating a wide range of stitch techniques. From simple stitches to intricate patterns, hand embroidery is a versatile craft that can be used to embellish clothing, home décor, accessories, and more.

The beauty of hand embroidery lies in its ability to add texture, color, and personalization to any project. It’s also a relaxing and meditative hobby that allows for creative expression. Whether you’re interested in learning basic stitches or experimenting with more complex techniques, hand embroidery offers something for everyone.

Basic Hand Embroidery Stitches Every Beginner Should Know

Before diving into advanced techniques, it’s important to master the foundational stitches that form the backbone of most hand embroidery projects. Here are some of the essential stitches every beginner should know:

Running Stitch

The running stitch is one of the simplest and most common embroidery stitches. It involves passing the needle in and out of the fabric in a simple, continuous motion, creating a series of evenly spaced dots. The running stitch is perfect for outlining shapes or adding delicate details to your designs.

Mastering Hand Embroidery Techniques

Backstitch

The backstitch is another fundamental embroidery stitch. It creates a solid line by stitching backward over the previous stitch, giving a clean and defined edge. This stitch is commonly used for outlining shapes, lettering, and fine details in embroidery projects.

Chain Stitch

The chain stitch creates a series of looped stitches that resemble a chain. It is often used to add texture and dimension to designs, as well as for creating borders or decorative patterns. The chain stitch can be worked in various sizes and directions to suit different designs.

French Knot

The French knot is a small, decorative knot that adds texture and depth to your embroidery. It’s created by wrapping the thread around the needle and pulling it through the fabric to form a knot. French knots are commonly used to create textured accents, such as flower centers or dots.

Satin Stitch

The satin stitch is used to fill shapes with smooth, solid areas of thread. It involves stitching parallel lines very close together to cover the fabric completely. Satin stitch is perfect for adding vibrant color and a polished finish to your embroidery projects.

Advanced Hand Embroidery Techniques to Elevate Your Craft

Once you’ve mastered the basic stitches, it’s time to experiment with more advanced techniques. These methods can help you add depth, texture, and intricate detail to your embroidery projects.

Thread Painting

Thread painting is a technique that uses long, smooth stitches to create a painterly effect on fabric. By layering and blending different colors of thread, you can achieve realistic shading, texture, and depth, making your embroidery designs appear almost like paintings. This technique is often used for creating lifelike portraits, animals, flowers, and landscapes.

Thread painting requires patience and precision, as it involves working with fine details and subtle color transitions. It can be a challenging technique to master, but the results are stunning.

Crewel Embroidery

Crewel embroidery is a traditional technique that uses wool thread to create intricate designs on fabric. This method is known for its bold, textured stitches and its ability to create rich, decorative patterns. Crewel work is often used for floral designs, birds, and nature-inspired motifs.

Unlike cotton thread, wool is thicker and adds a three-dimensional quality to the design. It can also be used to create different effects, such as shading or creating a raised texture.

Goldwork Embroidery

Goldwork embroidery is an elegant and luxurious technique that uses metallic threads, often gold or silver, to create intricate designs. This technique is popular in creating regal or ornamental embroidery, often used for historical costume embellishments, religious artifacts, or ceremonial textiles.

Goldwork embroidery can involve a variety of stitches, including couching, padding, and looping, to create beautiful, eye-catching effects. While it can be a more advanced technique, the stunning visual results are worth the effort.

Raised or 3D Embroidery

For a truly unique effect, raised or 3D embroidery allows you to create textured designs that pop off the fabric. This technique uses various methods such as padding stitches, French knots, or bullion knots to add dimension to your work. Raised embroidery is perfect for creating floral designs, textured animals, or any piece that requires extra depth and tactile appeal.

Raised embroidery can be a bit challenging as it involves layering stitches, but the results are beautiful and bring your designs to life in a way that flat stitches can’t match.

Tips for Mastering Hand Embroidery

To truly master hand embroidery, it’s essential to approach the craft with patience, practice, and precision. Here are a few tips to help you perfect your embroidery skills:

Use the Right Tools and Materials

Having the proper tools is key to successful embroidery. Invest in a good-quality needle, embroidery hoop, and fabric. Cotton fabric is often a great choice for beginners, while linen or silk can be used for more intricate or advanced projects. Choose threads that suit your design, whether they’re cotton, silk, wool, or metallic.

Practice Regularly

Like any craft, hand embroidery requires practice to improve. Start with simple designs and gradually move on to more complex projects as you gain confidence. The more you stitch, the more you’ll improve your skills and learn the nuances of different stitches.

Pay Attention to Tension

The tension of your stitches is crucial in creating clean, consistent embroidery. Practice adjusting the tension of your thread and make sure it’s neither too tight nor too loose. This will help ensure that your stitches are even and your finished project looks polished.

Experiment with Colors and Textures

One of the best aspects of hand embroidery is the freedom to experiment with colors and textures. Don’t be afraid to try different color combinations, threads, and stitches to create unique designs. Mix different techniques for added variety and depth in your projects.

Conclusion

Mastering hand embroidery techniques is a rewarding and creative journey. By starting with basic stitches and gradually progressing to advanced techniques, you can create beautiful, personalized pieces of art. Whether you’re stitching a simple design or working on a more intricate project, hand embroidery allows for endless possibilities and creative expression.

Remember, practice is key, and the more you work with different techniques, the more you’ll develop your unique style. So pick up your needle and thread, and start creating your next embroidered masterpiece!

Essential Heat Pressing Tips for Work Clothes

Essential Heat Pressing Tips for Work Clothes

Essential Heat Pressing Tips for Work Clothes: A Comprehensive Guide

Introduction: The Importance of Heat Pressing for Work Clothes

Heat pressing is a popular and effective method for customizing work clothes, from adding company logos and employee names to creating unique designs for work uniforms. Whether you’re personalizing t-shirts, jackets, or aprons, the heat press ensures that designs are durable, vibrant, and professional. However, to achieve the best results and prevent common mistakes, it’s essential to understand the right techniques and safety measures. In this article, we’ll explore essential heat pressing tips for work clothes to ensure high-quality results and a safe, efficient process. https://www.industrialandsafetywarehouse.com.au/heat-pressing-on-different-fabrics/

1. Understanding the Heat Press Process

Before diving into heat pressing tips, it’s important to understand how a heat press works. A heat press uses both heat and pressure to transfer designs onto fabrics. This method is commonly used in the garment industry to create custom work clothes. The process involves placing a transfer material (such as vinyl or sublimation prints) onto the fabric, and then applying heat and pressure for a set amount of time.

1.1 Key Components of a Heat Press Machine

Heating Plates: The main components that transfer heat to the fabric. These plates can reach temperatures of up to 400°F (200°C).
Pressure Mechanism: Ensures that the design is pressed onto the fabric evenly.
Timer and Temperature Controls: Allows you to set the precise time and temperature for different materials and designs.
Handle or Lever: Used to open and close the press, ensuring that the heat is applied evenly.

2. Choosing the Right Heat Press Machine for Work Clothes

Selecting the right heat press machine is crucial for successful heat pressing on work clothes. There are different types of heat press machines, and each type offers different advantages. Here’s a breakdown of the most common options:

2.1 Clamshell Heat Press

The clamshell heat press is one of the most popular types. It features a top plate that opens like a clamshell. This design allows for quick loading and unloading of fabrics. Clamshell presses are ideal for smaller spaces but are best suited for lighter materials.

Essential Heat Pressing Tips for Work Clothes

2.2 Swing-Away Heat Press

A swing-away heat press has a top plate that swings to the side, creating more space for placing materials. This type of press provides more safety and flexibility, especially for larger and thicker fabrics like jackets or hoodies.

2.3 Draw-Style Heat Press

This press has a sliding drawer mechanism that allows you to load and unload materials without lifting heavy parts. It is a great choice for those who need to work with larger batches of work clothes.

3. Preparing Your Work Clothes for Heat Pressing

Proper preparation of the work clothes is key to achieving a clean and crisp heat press result. Preparation involves selecting the right fabric, cleaning the garment, and preparing the design.

3.1 Choose the Right Fabric

Not all fabrics are suitable for heat pressing. Fabrics like cotton, polyester, and cotton blends work well with heat presses. However, heat pressing on delicate fabrics such as silk or spandex can damage the material. Always check the fabric type before starting the heat pressing process.

3.2 Clean the Work Clothes

Before heat pressing, ensure that the work clothes are clean and free from wrinkles. Dirt, oils, or debris on the fabric can interfere with the heat transfer process and lead to uneven designs. Iron or steam the garment to remove any wrinkles, as these can cause uneven heat distribution.

3.3 Prepare the Design

Whether you’re using heat transfer vinyl (HTV), sublimation, or screen printing, ensure that your design is correctly sized and positioned on the fabric. Measure and mark the placement of the design to ensure it’s centered and aligned properly.

4. Heat Pressing Techniques for Work Clothes

Now that you’ve prepared the fabric and design, it’s time to heat press. Follow these essential heat pressing tips for optimal results.

4.1 Set the Right Temperature and Time

Each type of fabric and transfer material requires a specific temperature and pressing time. For example, vinyl transfers typically require a temperature of around 305°F (150°C) and a pressing time of 10-15 seconds. Always refer to the manufacturer’s recommendations for both the fabric and the transfer material to ensure you use the correct settings.

4.2 Adjust the Pressure

Pressure is key when heat pressing. Too little pressure may result in a weak bond between the transfer and fabric, while too much pressure can damage the fabric or transfer material. Adjust the pressure based on the thickness of the material being pressed. A medium pressure setting is usually sufficient for most work clothes.

4.3 Preheat the Fabric

Preheating the fabric for a few seconds before applying the transfer helps to remove any moisture and wrinkles, allowing the heat press to adhere the transfer more effectively. This step also helps ensure even heat distribution across the garment.

4.4 Use a Protective Sheet

To prevent the heat press from directly touching the transfer material, use a protective sheet such as parchment paper or Teflon sheets. This helps to avoid melting or burning the material and keeps the press clean.

4.5 Apply Consistent Pressure and Time

When using the heat press, it’s important to apply consistent pressure for the entire duration of the press. If you’re using a manual press, apply steady pressure throughout. If you’re using an automatic press, make sure the timer and pressure settings are correct before starting the process.

5. Post-Heat Press Care for Work Clothes

After heat pressing, it’s important to care for the garment properly to preserve the design’s longevity.

5.1 Allow the Garment to Cool

Once the heat press is finished, carefully remove the work clothes from the press and allow them to cool before handling. This helps the design to set properly and prevents smudging or damaging the transfer.

5.2 Follow Proper Washing Instructions

To ensure the longevity of the design, follow the washing instructions carefully. Most heat-pressed garments should be washed inside out in cold water and air-dried or tumble-dried on low heat. Avoid using harsh detergents or bleach, as this can damage the design.

6. Troubleshooting Common Heat Pressing Issues

Even with careful planning and execution, issues can arise during the heat pressing process. Below are some common problems and solutions:

6.1 Uneven Pressing

If the transfer appears uneven, it could be due to uneven pressure or temperature. Make sure the pressure is properly adjusted, and the heat plates are calibrated. Also, ensure the transfer is correctly aligned on the fabric before pressing.

6.2 Lifting or Peeling Transfers

If the transfer starts to lift or peel after pressing, it could be because the heat press wasn’t applied for long enough, or the pressure was too light. Try adjusting the settings and pressing for a few more seconds.

6.3 Burns or Damage to Fabric

If the fabric is damaged during heat pressing, it’s usually due to excess heat or pressure. Always monitor the temperature and time settings carefully, and be sure to use the correct settings for the type of fabric you’re pressing.

Conclusion: Mastering Heat Pressing for Work Clothes

Heat pressing is an excellent way to customize work clothes for a professional look and durability. By following the tips and techniques outlined in this article, you can ensure that your heat pressing process is both safe and effective. From selecting the right heat press machine to understanding the correct temperature, pressure, and post-care instructions, mastering these steps will help you create high-quality, long-lasting designs on work clothes. Stay informed, stay safe, and enjoy the process of customizing your workwear for a polished and professional result.

Heat Pressing Logos on Work Clothes

Heat Pressing Logos on Work Clothes

Heat Pressing Logos on Work Clothes: The Ultimate Guide

Customizing work clothes with logos is an excellent way to promote your brand, improve employee recognition, and maintain a professional appearance. One of the most effective and popular methods for applying logos to work clothes is heat pressing. This process offers numerous benefits, including durability, quick turnaround times, and versatility. In this article, we will dive into the details of heat pressing logos on work clothes, covering everything from the process to the benefits, and how to care for your heat-pressed garments.

What is Heat Pressing for Logos?

Heat pressing is a process that involves applying a logo or design onto fabric using a combination of heat and pressure. It is typically done with a heat press machine that transfers a pre-cut design, often made from heat transfer vinyl (HTV), onto a garment. Heat pressing creates a durable bond between the fabric and the logo, ensuring it stays in place even after repeated washings.

The Heat Press Process Explained

The heat press machine works by applying a precise amount of heat and pressure to transfer the logo or design onto the fabric. The process usually follows these basic steps:

Design Preparation: First, the logo is designed digitally. It is then cut from heat transfer vinyl (HTV) or printed onto transfer paper.
Placing the Design: The prepared design is placed on the garment in the desired location.
Heat Application: The heat press machine is set to the optimal temperature (usually between 300°F and 375°F) and pressure, then the design is pressed onto the fabric for a few seconds.
Cooling Down: After pressing, the garment is left to cool, allowing the design to bond securely with the fabric.

This method is incredibly versatile and can be used on a variety of fabrics, including cotton, polyester, and blends.

Benefits of Heat Pressing Logos on Work Clothes

Heat pressing has become a popular choice for logo application due to its numerous advantages. Let’s explore some of the key benefits it offers.

1. Durability and Longevity

One of the primary reasons businesses choose heat pressing for logos on work clothes is the long-lasting durability. The heat press process creates a strong bond between the logo and the fabric, meaning that the logo will not easily fade, peel, or crack, even after multiple washes. This is especially important for workwear that undergoes frequent laundering and heavy use, as it ensures the logo remains clear and professional-looking for a long time.

2. Professional and Clean Appearance

Heat pressing produces a smooth, clean finish that gives work clothes a professional appearance. The logos are sharp, precise, and vibrant, adding a polished touch to your workwear. Unlike some other methods, such as embroidery, heat pressing does not add bulk or weight to the garment, making it a comfortable option for employees who need to move freely throughout the workday.

3. Quick Turnaround Time

Time is often of the essence when it comes to outfitting employees with custom work clothes. Heat pressing offers a relatively quick turnaround, especially when compared to other methods like screen printing or embroidery, which may require more complex setups. Once the design is ready, the heat press process only takes a few seconds, allowing you to quickly produce large quantities of work clothes with logos.

4. Cost-Effective for Small Orders

Heat pressing is a cost-effective option for businesses that need a smaller batch of workwear. Unlike screen printing, which can have high setup costs that are only justified with larger orders, heat pressing allows you to produce small quantities at an affordable price. This makes it a great option for companies that need customized workwear for a small team or a specific event without the need for bulk orders. Find our products here.

Heat Pressing Logos on Work Clothes

5. Versatility in Design

Heat pressing offers incredible design versatility. Whether you need to apply a simple text logo, a multi-colored graphic, or an intricate design, heat pressing can handle it all. The use of heat transfer vinyl (HTV) allows for vibrant, multi-color logos, and even more complex designs can be achieved using printed transfers. This versatility makes heat pressing suitable for all types of industries, including hospitality, construction, retail, and corporate settings.

Types of Fabrics Best for Heat Pressing Logos

Heat pressing works on a wide range of fabrics, but some materials respond better to the heat and pressure than others. Understanding which fabrics work best for heat pressing can help you achieve optimal results.

Cotton

Cotton is one of the most commonly used fabrics for heat pressing logos. It absorbs heat well and allows the logo to bond easily to the fibers, resulting in a durable and high-quality finish. Cotton-based work clothes, such as T-shirts, uniforms, and hats, are ideal for heat pressing.

Polyester

Polyester is another popular fabric for heat pressing. It is durable, lightweight, and resists shrinking, making it an excellent choice for uniforms and sportswear. Polyester also has moisture-wicking properties, which are beneficial for employees in active environments. Heat pressing on polyester fabrics results in a vibrant, long-lasting logo that can withstand regular wear and tear.

Polyester-Cotton Blends

Polyester-cotton blends offer the best of both worlds: the softness and comfort of cotton, combined with the durability and moisture-wicking benefits of polyester. These blended fabrics are perfect for heat-pressed logos, as they hold the design well and are comfortable to wear for extended periods.

How to Care for Heat Pressed Logos on Work Clothes

Proper care is essential to maintaining the integrity of your heat-pressed logos. Follow these simple tips to extend the life of your customized work clothes:

1. Wash Inside Out

When washing heat-pressed work clothes, turn them inside out to protect the logo from direct friction with other garments or the inside of the washing machine. This minimizes wear and tear on the design.

2. Use Cold Water

To preserve the adhesive bond and prevent the logo from fading or peeling, wash heat-pressed work clothes in cold water. Hot water can weaken the adhesive, leading to premature damage to the logo.

3. Avoid Ironing on the Design

When ironing heat-pressed garments, avoid ironing directly over the logo. Ironing on the design can cause the vinyl to lift or distort. Instead, iron on the reverse side or use a pressing cloth to protect the design.

4. Air Dry Whenever Possible

For optimal longevity, air dry your heat-pressed work clothes rather than using a dryer. The heat from the dryer can cause the logo to weaken or warp. Hanging the clothes to dry or laying them flat is the best way to protect the design.

Conclusion: Heat Pressing Logos for Professional Work Clothes

Heat pressing logos onto work clothes is a smart choice for businesses looking to create durable, professional, and eye-catching customized garments. This method offers numerous benefits, including durability, quick turnaround times, cost-effectiveness for small orders, and versatility in design. Whether you’re outfitting employees with branded uniforms or creating custom workwear for a special event, heat pressing provides a reliable solution to achieve high-quality results. With proper care, your heat-pressed logos will remain vibrant and intact, ensuring your work clothes continue to represent your brand with pride. https://www.industrialandsafetywarehouse.com.au/the-art-of-sports-gear-embroidery/

Heat Pressing Safety Tips for Workwear

Heat Pressing Safety Tips for Workwear

Heat Pressing Safety Tips for Workwear: A Comprehensive Guide

Introduction: Why Heat Pressing Safety Matters for Workwear

Heat pressing is a widely used method for customizing workwear, from adding logos to personalizing uniforms. However, like any other process that involves heat and machinery, safety is a crucial factor that cannot be overlooked. Heat presses use high temperatures to imprint designs onto fabric, and without proper safety precautions, workers can be exposed to various hazards, such as burns, electrical risks, or repetitive strain injuries. In this article, we will explore the essential heat pressing safety tips that every business and individual should follow to ensure a safe and efficient process when working with workwear.

1. Understanding the Heat Press Machine

Before starting any heat pressing work, it’s important to understand how the heat press machine works. A heat press uses both heat and pressure to transfer a design onto workwear materials. Typically, the machine consists of two heated plates: one top plate that presses down and one bottom plate that supports the fabric.

1.1 Key Components of a Heat Press

A standard heat press machine consists of the following components:

Heat Plates: These are the parts that generate the heat necessary for transferring designs. They are typically made of metal or aluminum and can get extremely hot, so it’s crucial to handle them with care.
Timer and Temperature Control: These controls allow users to set the appropriate time and temperature for specific fabrics or transfers.
Pressure Adjustment: The pressure needs to be set correctly depending on the thickness of the fabric or material being pressed. Too much pressure can damage the fabric, while too little will result in incomplete transfers.
Handle or Lever: This part is used to open and close the press, and it’s important to be cautious when operating it to avoid pinching your hands.

2. Basic Heat Pressing Safety Tips

Heat pressing workwear involves handling hot equipment, which is why it is essential to follow proper safety protocols. Below are some of the fundamental heat pressing safety tips that can prevent accidents and injuries:

2.1 Wear Protective Clothing

When heat pressing, always wear heat-resistant gloves to protect your hands from burns. Additionally, long sleeves and pants made from flame-retardant materials can offer additional protection. Avoid wearing loose clothing, as it can get caught in the machine, leading to potential hazards.

Heat Pressing Safety Tips for Workwear

2.2 Ensure Proper Ventilation

Heat presses can emit fumes or gases, particularly when working with synthetic fabrics or adhesives. Ensure that your workspace is well-ventilated to avoid inhaling harmful fumes. A fan or exhaust system should be in place to circulate air and minimize the risks associated with poor ventilation.

2.3 Use the Right Equipment for the Job

Using the right heat press machine for your workwear customization is essential for safety and effectiveness. There are different types of heat presses, including clamshell, swing-away, and draw-style presses. Ensure that the press you are using is suited for your workload and the materials you plan to work with.

2.4 Never Leave the Heat Press Unattended

Always supervise the heat press while it is in use. Leaving a machine unattended while it is heating can result in overheating, which can damage the workwear or even cause a fire. When you need to step away, always turn off the machine and allow it to cool down before returning. https://www.industrialandsafetywarehouse.com.au/the-art-of-sports-gear-embroidery/

3. Temperature and Pressure Settings: Getting It Right

A major part of heat pressing involves managing the temperature and pressure settings to ensure a safe transfer. Setting the wrong temperature or pressure can lead to serious mistakes, including fabric burns, incomplete transfers, or even machine malfunction.

3.1 Set Temperature According to Fabric Type

Different fabrics require different heat settings. For instance, polyester and cotton blend fabrics require lower temperatures compared to heavy-duty workwear materials like denim or canvas. Always check the manufacturer’s recommendations for the right temperature settings, and if in doubt, test on a small area of the material first.

3.2 Adjust the Pressure Appropriately

Too much pressure can damage the fabric, while too little pressure will result in poor transfer quality. Most modern heat presses allow users to adjust the pressure. Ensure that the pressure setting is balanced, depending on the fabric thickness and design being applied.

3.3 Use a Timer for Precision

Over-pressing can also damage workwear, so using the heat press’s built-in timer is essential. The timer ensures that the press stays on the fabric for the exact amount of time necessary to transfer the design without damaging the material.

4. Regular Maintenance and Safety Checks

Maintaining your heat press machine is vital for both its longevity and safety. Regularly inspecting and maintaining the machine can help prevent malfunctions and unsafe working conditions.

4.1 Clean the Heat Press After Each Use

After each pressing job, clean the heat press thoroughly to remove any excess transfer material, ink, or adhesive. Dirty heat plates can cause uneven heating or damage to workwear. Make sure to use the appropriate cleaning supplies and allow the machine to cool before cleaning.

4.2 Check for Damaged Cables and Wires

Inspect the heat press regularly for any exposed or frayed cables. Damaged wiring can pose an electrical hazard and should be addressed immediately. If the machine is showing signs of wear and tear, consider contacting a professional for repairs. For Sydney industrial printing, see here.

4.3 Calibrate the Machine

Over time, the calibration of your heat press machine may drift. It’s essential to periodically check the machine’s temperature and pressure accuracy. Using a heat press temperature gun and pressure testing device can help ensure that your machine is working at optimal levels.

5. Handling Heat Transfers Safely

Heat transfers, such as vinyl or sublimation designs, can also present their own safety risks when working with workwear. Proper handling and application of these materials are crucial for ensuring a safe and effective heat pressing process.

5.1 Handle Transfers with Care

When working with heat transfers, ensure you are using the appropriate gloves to avoid direct contact with hot materials. These materials can retain heat long after the press is finished, so it’s essential to let them cool before handling.

5.2 Avoid Overheating the Transfer Material

Overheating can cause the transfer material to warp, bubble, or even melt. Always monitor the temperature closely and ensure the press is only on for the recommended duration.

6. Conclusion: Ensuring Heat Pressing Safety for Workwear

Heat pressing is a highly effective way to customize workwear, but it’s crucial to follow safety guidelines to prevent accidents and injuries. By understanding the heat press machine’s components, following temperature and pressure guidelines, performing regular maintenance, and using proper safety gear, you can ensure a safe, efficient, and productive environment. Implement these safety tips to not only protect yourself and others but also to achieve the best results when personalizing workwear for your business or clients. Stay safe, and happy pressing!

Why Choose Heat Pressing for Work Clothes?

Why Choose Heat Pressing for Work Clothes?

Why Choose Heat Pressing for Work Clothes?

When it comes to customizing work clothes for your team, heat pressing has emerged as one of the most effective and efficient methods. Whether you’re outfitting employees in uniforms or creating personalized workwear for a business, heat pressing provides a durable and professional finish. In this article, we will explore the key reasons why heat pressing is the ideal choice for work clothes customization. Why Choose Heat Pressing for Work Clothes?

What is Heat Pressing?

Heat pressing is a method of applying a design or logo onto fabric using heat and pressure. A special heat press machine is used to transfer a pre-cut design or vinyl graphic onto the garment. This process results in a long-lasting, sharp, and professional look. Heat press technology is highly versatile and is used for everything from small designs to large logos on various types of fabric, making it perfect for workwear customization.

How Does Heat Pressing Work?

The heat press machine works by applying controlled heat and pressure to the fabric, bonding the design to the material. The process involves placing a heat transfer vinyl (HTV) sheet or transfer paper with the design onto the fabric. The heat press machine then applies high temperatures (typically around 300°F to 375°F) and moderate pressure to transfer the design. After a few seconds of pressing, the material cools down, and the design adheres permanently to the fabric.

Benefits of Heat Pressing for Work Clothes

Why Choose Heat Pressing for Work Clothes?

There are numerous reasons why businesses and organizations choose heat pressing as the preferred method for customizing work clothes. Let’s break down the benefits of this method.

1. Durability and Longevity

One of the standout benefits of heat pressing is the durability it offers. Designs transferred via heat press are typically more long-lasting than screen printing, especially on workwear that experiences heavy use. The heat press process creates a bond between the fabric and the design that is resistant to fading, cracking, or peeling, even after multiple washes. This makes it an excellent choice for work clothes that need to maintain a professional appearance throughout their lifespan.

2. Professional and Clean Appearance

Heat pressing creates sharp, vibrant, and precise designs that look professional. Whether it’s a company logo, employee name, or a specific graphic, heat pressing ensures a clean and crisp finish. The designs are smooth to the touch and do not add bulk or weight to the garment, which is essential for work clothes where comfort is just as important as appearance.

3. Versatility in Design

Heat pressing is incredibly versatile when it comes to design options. You can apply a wide range of graphics, text, and logos on work clothes, from small initials to large corporate logos. This customization flexibility makes heat pressing suitable for all types of industries, whether it’s construction, hospitality, or office settings. Moreover, heat press allows for intricate designs, such as multi-color logos, which may not be possible with other methods like embroidery.

4. Quick Turnaround Time

In today’s fast-paced business world, time is often of the essence. Heat pressing offers a faster turnaround compared to traditional methods like embroidery or screen printing. While screen printing can take several days to set up and complete, heat pressing can be done quickly and efficiently. Once your design is ready, the heat press process can take just a few seconds to transfer the design onto the garment. This makes it an ideal solution for businesses that need to outfit employees in customized workwear on short notice.

5. Cost-Effective for Small Orders

Heat pressing is a cost-effective solution, particularly when you have small batches of work clothes to customize. Unlike screen printing, which often requires large orders to be cost-effective due to setup costs, heat pressing can be done in smaller quantities at an affordable price. This makes it ideal for businesses that need a few uniforms or work shirts for a specific event, team, or department without breaking the budget.

6. Minimal Setup Requirements

The setup for heat pressing is relatively simple and does not require complex machinery or large production spaces. As long as you have a heat press machine, vinyl materials, and the right software to design your graphics, you can start pressing designs onto work clothes. The low barrier to entry makes heat pressing accessible for small businesses or teams who need customized workwear without the need for large investments.

Types of Materials Best Suited for Heat Pressing

Heat pressing works with a variety of fabrics, but some materials work better than others. Understanding the best fabrics for heat pressing ensures that your designs will adhere properly and last longer. Common fabrics used in heat pressing for workwear include:

Cotton

Cotton is one of the most common materials used for heat pressing due to its ability to withstand high temperatures and pressure. It absorbs the heat effectively, allowing designs to transfer smoothly. Cotton-based work shirts, uniforms, and caps are excellent choices for heat pressing.

Polyester

Polyester is another popular choice for heat pressing, especially in industries where moisture-wicking properties are important. Heat pressing works particularly well on polyester blends, making it a great option for workwear like uniforms, sports shirts, and jackets.

Blended Fabrics

Poly/cotton blends are also ideal for heat pressing, as they offer the durability of polyester with the softness of cotton. Work clothes made from these blends are often easier to maintain and remain comfortable throughout the workday. https://www.industrialandsafetywarehouse.com.au/step-by-step-guide-to-classic-embroidery-stitches/

How to Care for Heat Pressed Work Clothes

To ensure the longevity of your heat-pressed designs, proper care is essential. Follow these tips for maintaining the appearance of your customized work clothes:

1. Wash Inside Out

Turning the garment inside out before washing can help prevent the design from coming into contact with rough surfaces and avoid unnecessary friction during the wash.

2. Cold Water Wash

Always wash heat-pressed clothes in cold water to preserve the design. Hot water can cause the adhesive to weaken, potentially causing the design to peel or fade. Find our full range of services here.

3. Avoid Ironing Directly on the Design

If you need to iron the garment, do not iron directly on the heat-pressed design. Iron on the reverse side or use a pressing cloth to protect the graphic.

4. Air Dry

While it may be tempting to use a dryer, air drying your heat-pressed work clothes is the best way to preserve the design. Heat from the dryer can weaken the adhesive bond, leading to premature wear.

Conclusion: The Ideal Choice for Work Clothes Customization

Heat pressing offers a cost-effective, efficient, and durable method for customizing work clothes. With its ability to produce high-quality, long-lasting designs and its versatility in material and design options, heat pressing is the go-to solution for businesses looking to create professional workwear. Whether you need a small batch of customized shirts or a full set of uniforms for your team, heat pressing provides a quick, reliable, and affordable solution to your workwear needs.